Complete A to Z Glossary for Vector Art Conversion
Vector ArtTake a look at the famous Nike swoosh or Apple’s sleek design — these aren’t just shapes; they’re symbols of what we want to achieve. The cool thing is, that the appeal behind all these visuals often comes from vector art conversion. In today’s world, where first impressions count, knowing about vector art isn’t just for designers. So, this blog post is here to break down everything from A to Z, helping you get the hang of it and maybe even spark your next big idea!
Essential Vector Art Conversion Terminologies
1. Adobe Illustrator:
.jpg)
Adobe Illustrator is a powerful software that lets designers make all kinds of eye-catching visuals, from logos and icons to illustrations and text. Whether you’re creating something for a website or for print, Illustrator ensures your vector artwork stays crisp and professional, no matter how big or small it gets.
2. Bitmap:
Bitmaps, or raster images, are like pictures built from tiny squares called pixels. When you zoom in too much, you’ll start to see those pixels, and the image can get blurry. It’s a good reminder that, while bitmaps can look great, they have their limits when it comes to resizing.
3. Conversion:
Conversion is the process of turning a bitmap image, which consists of small pixels, into a vector file that uses mathematics to create lines and smooth shapes This process, also known as vectorization, ensures that your vector artwork can be resized as much as you wish, without losing any sharpness or quality.
4. Dots Per Inch (DPI):
DPI measures the width of a printed image. Basically, it tells you how many dots of ink are used per inch. Higher DPI means sharper images. While vector designs can be infinitely stretched without losing clarity, learning about DPI is key to successfully printing those stunning images.
5. Encapsulated PostScript (EPS):
EPS files are pretty handy when it comes to placing vector images into other formats. Think of them as a universal adapter—they make it easy to drop your designs into photos, illustrations, or other layouts without losing quality. This format is popular in design and printing because it works smoothly across different platforms, so your design stays clear and professional-looking every time.
6. File Formats:
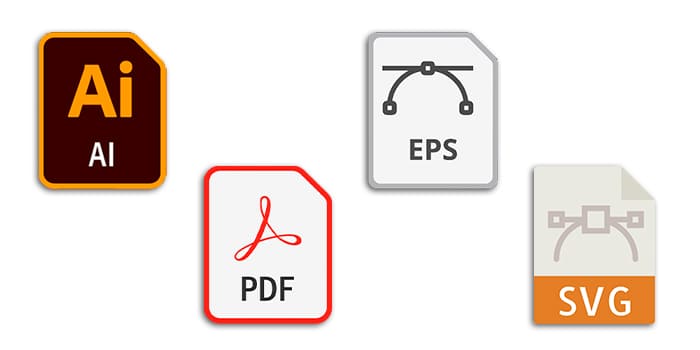
File formats. they really matter. Choosing the right types of Vector File Format — whether it’s AI, EPS, PDF, or SVG—can make or break your design’s versatility. Each format has a purpose: AI keeps it native, EPS is versatile, and SVG is perfect for scalable web graphics. Picking the right format means your vector graphics looks sharp and professional, wherever it’s used.
7. Graphic Design:
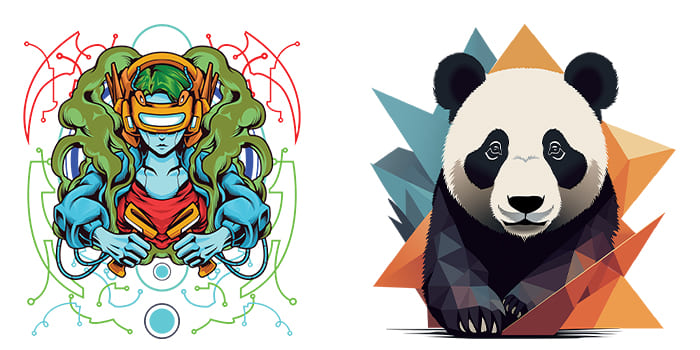
Graphic design tells a story through visuals, capturing attention and engaging audiences. A key element is vector art conversion, which transforms pixel-based images into smooth, scalable graphics, maintaining clarity and sharpness across all sizes and media. Professional graphic designers ensure precise execution for both print and digital use.
8. High-Resolution Images:
High-res images? They’re all about detail. Every little pixel stays put, so zooming in doesn’t blur the edges. When converting these to vector, you sometimes need to smooth out the lines to make sure nothing gets lost in translation, but it’s a must for that professional finish.
9. Image Editing Software:
Image editing programs, like Adobe Photoshop and CorelDRAW, are essential for any designer. These tools let you make fine adjustments, fix colors, and add creative effects to images. For vector art, they’re a huge help since they allow you to clean up the image before converting it to a scalable format.
10. Joint Photographic Experts Group (JPEG):
JPEG is a popular image format known for compressing photos to a manageable size without major quality loss. Though it’s a raster format, designers often use JPEGs as a starting point when converting to vector, keeping the original’s detail while prepping it for sharp, scalable graphics.
11. Kerning:
Kerning is the process of fixing the gap among letters to make the textual content look just right—balanced, smooth, and easy to examine. Designers often use this to refine the whole lot from headlines on billboards to the details of a business card.
In vector art, kerning isn’t just helpful; it’s essential for creating polished, professional designs that stand out.
12. Layer:
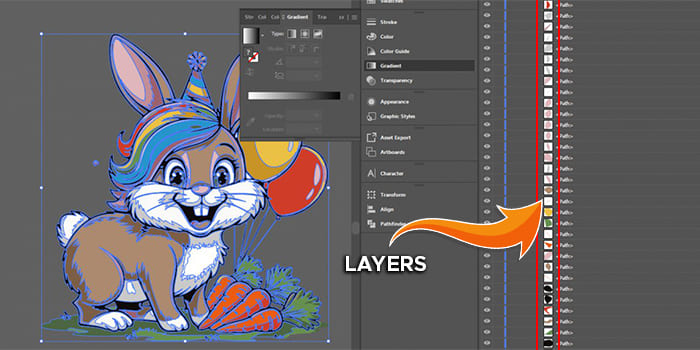
Layers let designers stack different parts of your artwork—like text, shapes, or images—without messing up the rest. Layers make editing a breeze, whether you’re working on a sleek magazine cover or a colorful poster. You can tweak one element without touching anything else, giving you the freedom to experiment and fine-tune every detail in your design.
13. Metadata:
Imagine having a bit of assistance on your design files. That’s metadata in vector art conversion! It keeps track of key details such as who created the design when it was made, and its format. This makes finding and handling your files a whole lot easier, specifically when running a design software program.
14. Node:
Nodes are the building blocks. Think of them as tiny dots that connect the lines and curves in your artwork. By transferring or tweaking those points, you can create particular shapes and add your private touch to any design.
15. Opacity:
Opacity is basically how much of the background shows through an object. It’s useful when you want to soften up a photograph or add cool overlays. It facilitates providing your design with that clean, layered look—like adding a touch of mystery to an image.
16. Portable Document Format (PDF):
You’ve possibly seen PDFs anywhere, but did you know they can hold vector designs, too? With this, you may store scalable, high-quality snapshots properly inside a PDF, making them ideal for sharing, printing, or maybe archiving without dropping that crispness.
17. Quality:
Quality matters in raster to vector conversion as it transforms a raster image into a vector, and the sharpness and readability of the authentic detail pop out sharp at the transformed picture. Sometimes, a little manual touch-up goes a long way to make the image flawless.
18. Raster:
In vector artwork, a raster picture is turned into a vector with the usage of paths and shapes, no longer pixels. These paths allow the photograph to scale up or down without losing any fine. It’s like having a design that’s as sharp as you want it.
19. Scalability:
Scalability is key when working with vector design. That means you can expand or shrink your design without losing some detail. Unlike a raster image, which is resized and blurred, vectors are created mathematically. They can grow or shrink as much as you want without breaking a sweat.
20. Tracing:
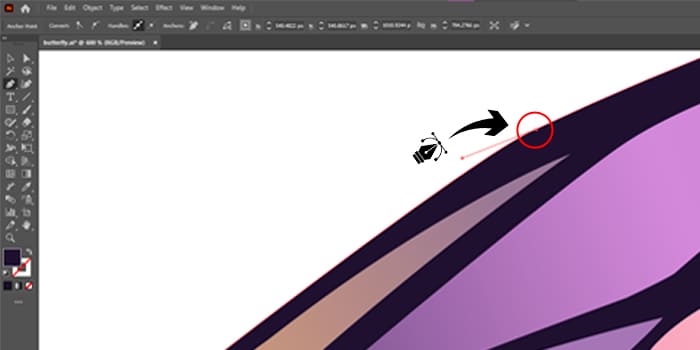
Tracing is where the magic happens. It's the process of rendering an image with vector shapes, giving you new scalable graphics that look dynamic at any size. It's a digital approach to painting—clean, precise, and highly creative.
21. Upscaling:
With vector designs, you’re working with mathematical equations—not pixels—so you can expand or shrink as much as you want without compromising detail and quality loss.
22. Vectorization:
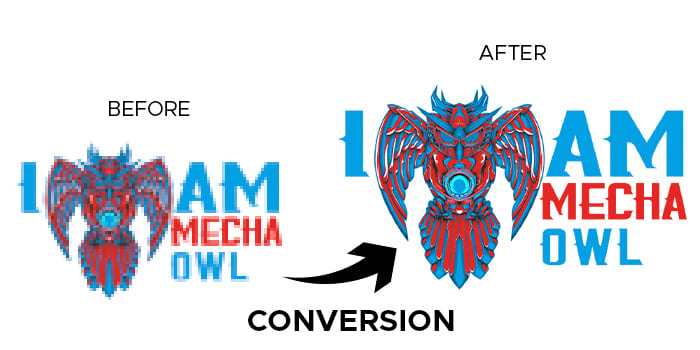
Vectorization is like fitting an image. You look for lines, and shapes, and boom—suddenly, your image is customizable without losing any of its quality. Perfect for everything from t-shirts to billboards. Sure, manual vectorization can take a lot of time (and money), but it’s worth it for that fine-tuned, professional finish.
23. Weight:
When you look at a design, do you notice how some lines are thick and others are thin? That’s called weight. It’s just the thickness of the lines in your design. You can change it to make the lines look soft and delicate or bold and strong.
24. X-Axis:
Now, X-Axis? That’s basically the horizontal axis of the coordinate system. Think of it as a left and right ruler who helps keep everything in place. It determines where objects will sit throughout your layout, ensuring that its dimensions are properly aligned. That’s a major plus when dealing with logos or large prints!
25. Y-axis:
Okay, let’s talk about the Y-axis. It’s all about placing objects at the top and bottom of your vectors. Without it, your designs would be basically floating in space. It controls the height, keeping your art in balance—simple, but crucial!
26. Zoom:
Zooming in on a vector image is like looking at a painting with a magnifying glass—every line is clean, and every curve remains sharp. And unlike raster images, which start to look like a pixelated mess when you zoom in too much, vector images remain crisp and clear. So yes, it’s a huge win for graphic artists everywhere.
Wrapping Up!
Vector artwork conversion is more than a design process—it’s a doorway to creative freedom and limitless opportunities. By learning key concepts like file formats, scalability, and vectorization, you can transform ordinary visuals into expert, scalable designs that stand out. Whether it’s crafting logos, enhancing brand identity, or creating eye-catching prints, Cre8iveSkill ensures sharpness and adaptability at any size through professional vector designs.
The beauty of vector graphic lies in its versatility and precision, empowering designers to deliver their boldest ideas to existence. So, embody this art form and permit your creativity shape visuals that depart an enduring impact.
